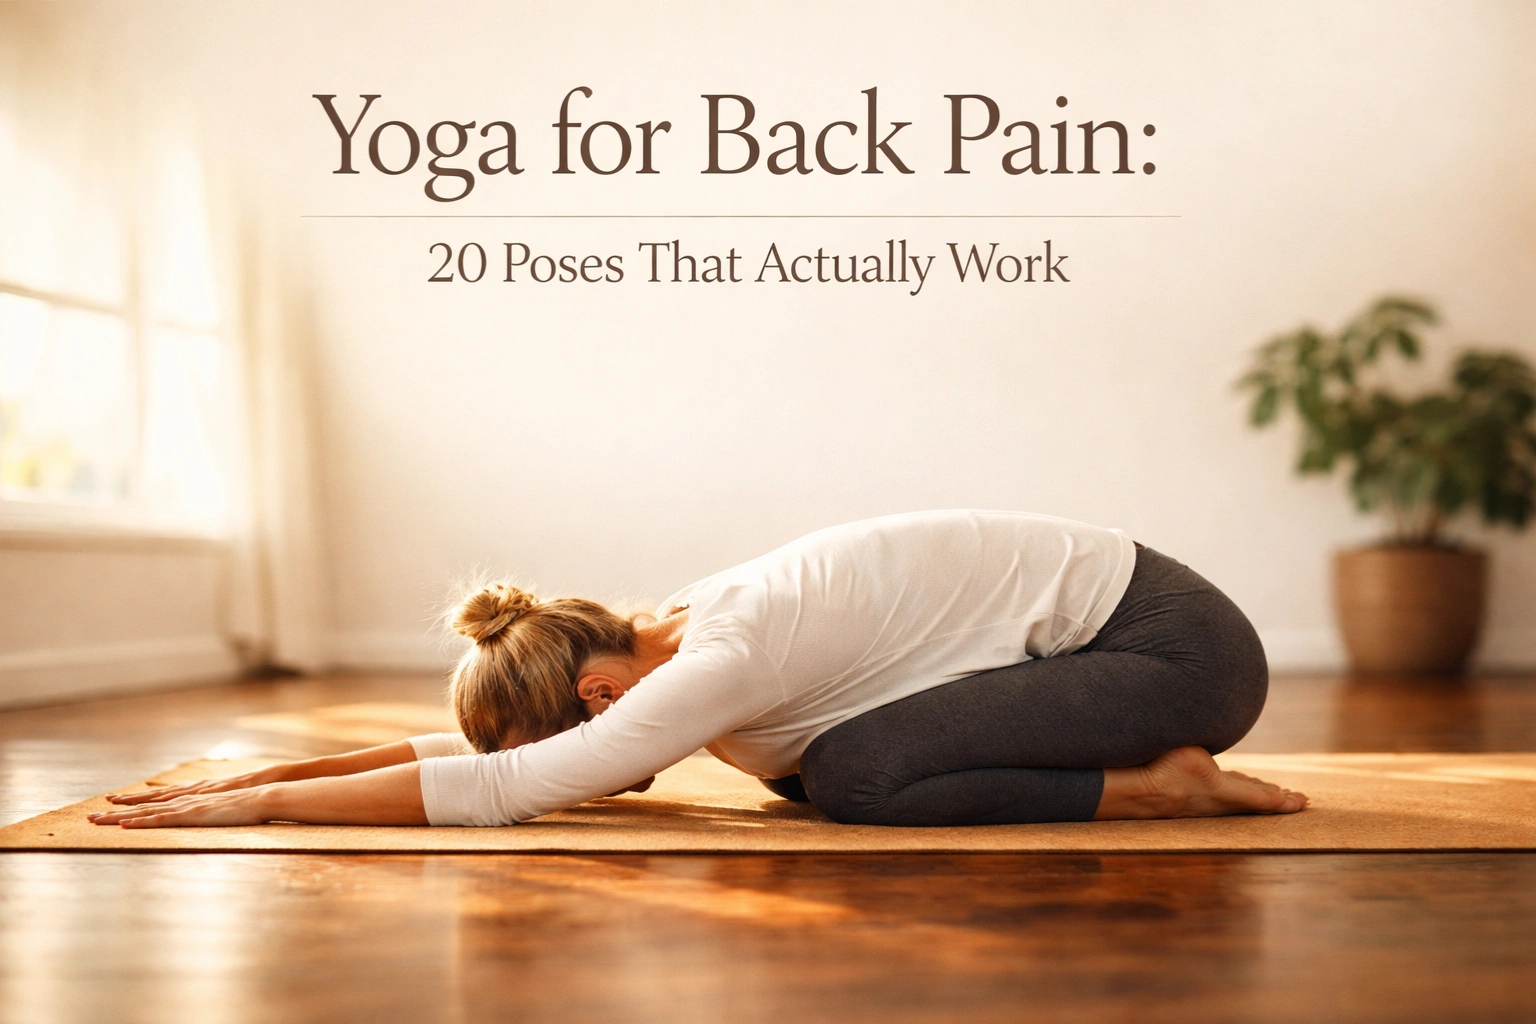
Yoga poses for back pain are one of the most evidence-backed, non-medication approaches for reducing chronic spinal discomfort. A 2017 study in the Annals of Internal Medicine found yoga was as effective as physical therapy for chronic low back pain. These poses work by strengthening the muscles supporting your spine, improving flexibility, and reducing nerve compression. They help adults of all fitness levels — including complete beginners. You don’t need to be flexible to start.
Getting out of bed used to be the hardest part of your day. Not because you’re tired — but because the moment your feet hit the floor, that familiar ache radiates up from your lower back, or the stiffness in your upper spine makes you move like you’re made of concrete. You grab your coffee, sit down at your desk, and by 10 a.m. you’re already shifting in your chair, trying to find the one position that doesn’t hurt.
Yoga poses for back pain are something a lot of people in that situation eventually find their way to — often after trying everything else. Ibuprofen takes the edge off. The heating pad helps for twenty minutes. But neither of them fixes anything. What most people don’t realize is that back pain is often a structural problem: weak core muscles, tight hip flexors, compressed discs, and a spine that’s been held in the same position for too long. Yoga addresses all of it.
This guide covers 20 yoga poses for back pain, organized by pain type — lower back, spine health, neck and upper back, and chronic pain. You’ll get step-by-step instructions for each pose, the science behind why it works, beginner modifications, and a simple 15-minute routine to start this week.
Let’s start with why yoga actually works before we get into the poses themselves.
Why Yoga Works for Back Pain
Think of your spine as a tent pole. It stays upright only because the ropes on all sides — your muscles — are balanced and taut. When those muscles are weak, tight, or uneven, the pole tilts. That’s what creates most non-acute back pain: imbalanced muscular support around the spine.
Yogasana for back pain relief works by targeting exactly these structures. Regular practice strengthens the paraspinal muscles (the muscles running along either side of your spine), lengthens the hip flexors that pull your pelvis forward, and improves overall spinal flexibility — reducing the compression that pinches nerves and causes that deep, grinding ache.
A 2017 study published in the Annals of Internal Medicine compared yoga directly to physical therapy for adults with chronic low back pain. Yoga was equally effective — producing the same measurable reduction in pain and improved physical function. That’s not a small claim. Physical therapy is the standard medical referral for chronic back pain, and yoga matched it.
Yoga also has a second mechanism that physical therapy doesn’t always address: it teaches you how to breathe through discomfort, reducing the muscular tension that tightens reflexively around painful areas. That tension-release cycle is often what keeps pain chronic.
The types of back pain that respond best to yoga: lower back muscle tightness, postural upper back pain, sciatica-adjacent hip tightness, and stress-related back tension. Acute injuries and structural conditions require medical assessment first — more on that next.
Important: Who Should Not Do Yoga for Back Pain
If you have any of the following conditions, check with your doctor before starting any yoga routine — even a gentle one. This isn’t about being overly cautious. It’s about making sure the poses help rather than aggravate.
Get medical clearance first if you have: a herniated or bulging disc, spinal stenosis, a vertebral fracture (including compression fractures from osteoporosis), or a history of spinal surgery within the past 12 months. In many of these cases, yoga can still help — but your doctor or physical therapist needs to guide which poses are appropriate for your specific situation.
Best Yoga Poses for Lower Back Pain
Yoga poses for lower back pain work best when they combine gentle spinal decompression with targeted strengthening of the glutes, core, and hip flexors — the three muscle groups most responsible for lower back stability.
1. Cat-Cow Stretch (Marjaryasana-Bitilasana)
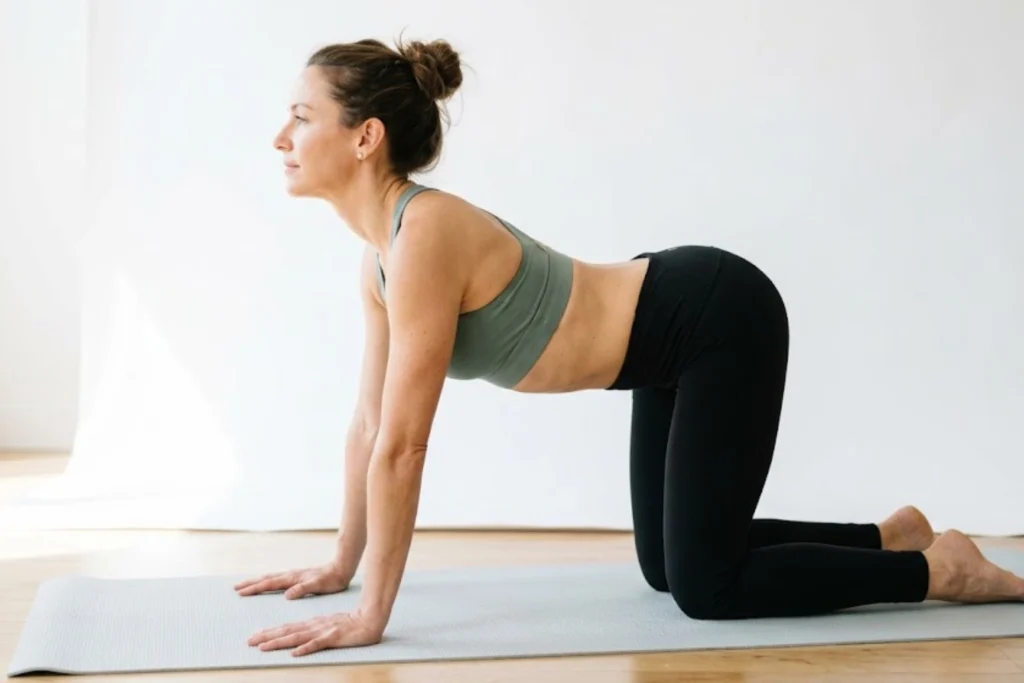
Best for: General lower back stiffness, morning tightness, and spinal mobility
How to do it:
- Start on hands and knees — wrists under shoulders, knees under hips.
- Inhale: drop your belly toward the floor, lift your chest and tailbone (Cow).
- Exhale: round your spine toward the ceiling, tuck chin to chest (Cat).
- Move slowly, one breath per movement, for 8–10 rounds.
- Come back to neutral on an inhale, then sit back toward your heels to rest.
Why it works: Cat-Cow moves the spine through its full flexion-extension range, pumping synovial fluid through the facet joints and gently mobilizing the intervertebral discs. It also warms up the paraspinal muscles without load.
Beginner modification: If wrist pressure is uncomfortable, make fists instead of flattening your palms, or place a folded blanket under your knees.
Caution: Move within a pain-free range — if either position causes sharp pain, reduce your range of motion rather than pushing through.
Child’s Pose (Balasana)
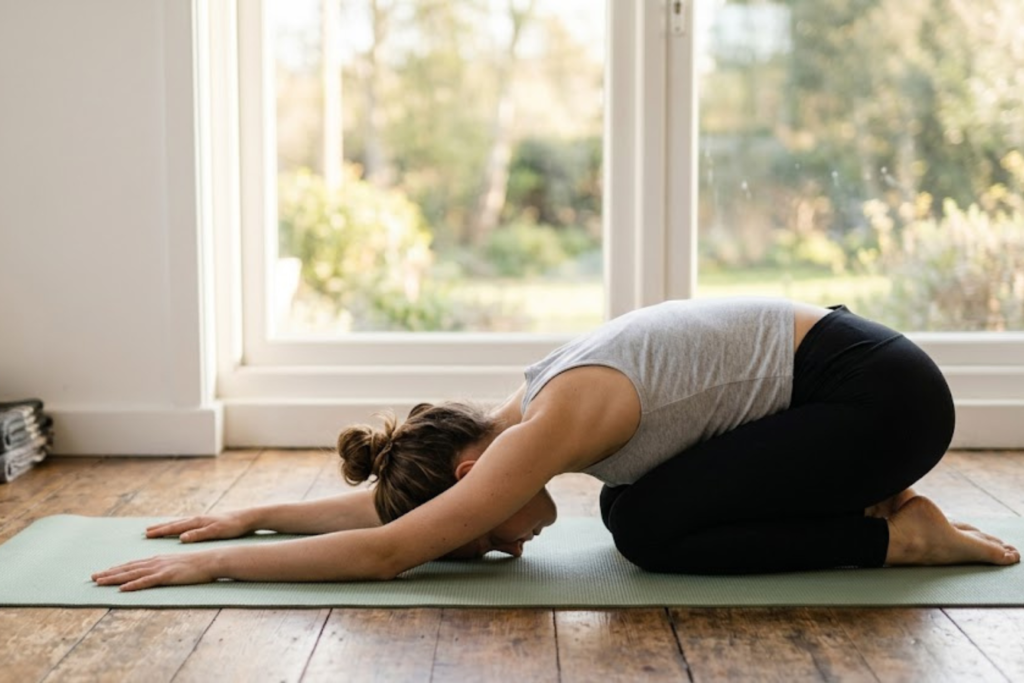
Best for: Lower back decompression, lumbar tension, stress-related back pain
How to do it:
- From kneeling, sink your hips back toward your heels.
- Extend your arms forward on the mat or rest them alongside your body.
- Let your forehead drop to the mat — or to a folded blanket if that’s more comfortable.
- Breathe deeply into your lower back and hold for 60–90 seconds.
- Walk your hands back slowly and press up to seated.
Why it works: Child’s Pose creates passive traction in the lumbar spine — the body weight gently separates the vertebrae, reducing compression on the discs and nerves. It also stretches the erector spinae muscles along the back.
Beginner modification: Place a rolled blanket or pillow between your thighs and calves if your hips don’t reach your heels comfortably.
Caution: Avoid this pose if kneeling causes knee pain — use a thick pad under the knees or skip to the next pose.
Knees-to-Chest Pose (Apanasana)
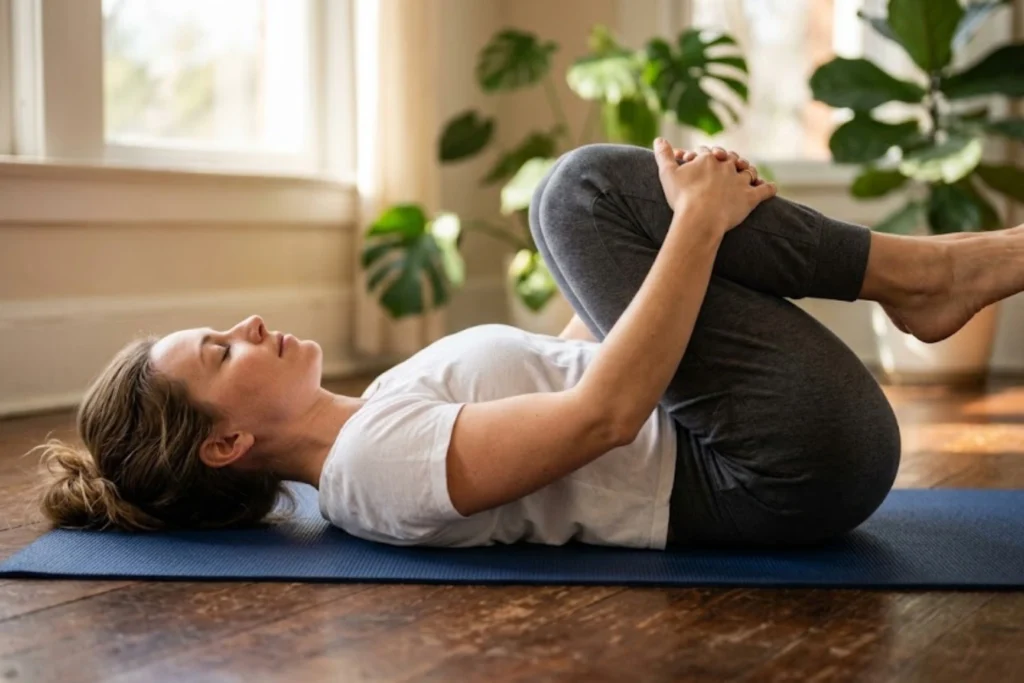
Best for: Acute lower back tightness, sciatica-related hip tension, morning stiffness
How to do it:
- Lie flat on your back with legs extended.
- Draw both knees toward your chest and wrap your arms around your shins.
- Gently rock side to side for 30 seconds to massage the sacrum.
- Hold still for another 30 seconds, breathing slowly.
- Release one leg at a time back to the mat.
Why it works: This pose directly decompresses the sacroiliac joint and lumbar spine. The gentle rocking motion stimulates the multifidus — a deep spinal stabilizer that frequently becomes inhibited in people with chronic low back pain.
Beginner modification: Hold just one knee at a time while the other leg stays extended — easier on the lower back and hip flexors.
Caution: Don’t pull your knees forcefully toward your chest. Let gravity and gentle arm pressure do the work.
Supine Spinal Twist (Supta Matsyendrasana)
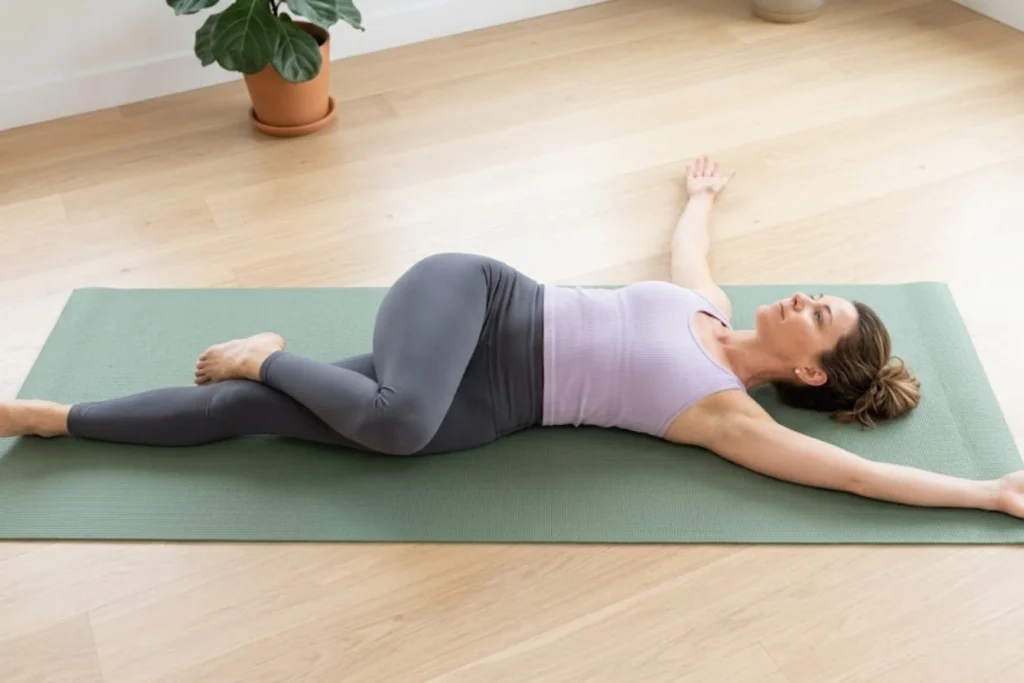
Best for: Lower back rotation stiffness, one-sided back pain, hip tightness
How to do it:
- Lie on your back. Draw your right knee to your chest.
- Use your left hand to guide the right knee across your body toward the floor.
- Extend your right arm out to the side and turn your gaze right.
- Hold for 45–60 seconds, breathing slowly. Feel the rotation through your lower back.
- Return to center and repeat on the other side.
Why it works: Spinal rotation stretches the quadratus lumborum (a key lower back pain muscle) and releases the thoracolumbar fascia — the thick connective tissue that stiffens with poor posture and prolonged sitting.
Beginner modification: Place a folded blanket under the knee that crosses over to reduce the depth of the twist.
Caution: If you feel sharp nerve pain shooting down your leg during this pose, come out of the twist immediately and consult a healthcare provider.
Bridge Pose (Setu Bandha Sarvangasana)
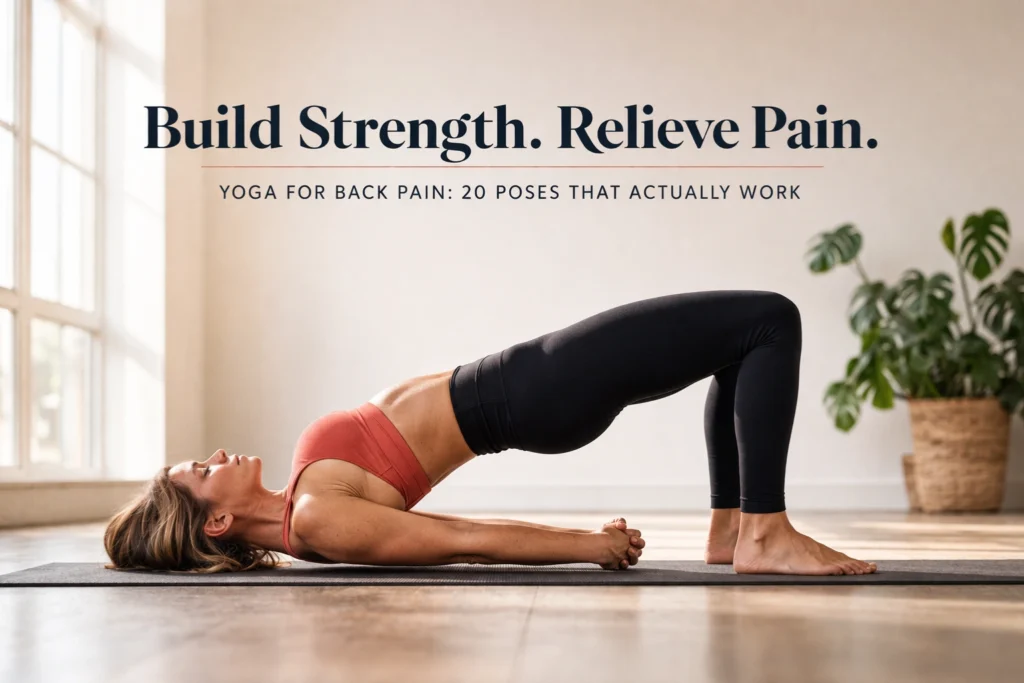
Best for: Lower back weakness, glute inhibition, lumbar instability
How to do it:
- Lie on your back with knees bent, feet hip-width apart and flat on the floor.
- Press your feet into the mat and lift your hips toward the ceiling.
- Clasp your hands beneath your back and press your arms into the mat.
- Hold for 30–45 seconds, squeezing the glutes throughout.
- Lower your spine slowly, one vertebra at a time.
Why it works: Bridge Pose strengthens the gluteus maximus, hamstrings, and erector spinae — the primary posterior chain muscles that support the lumbar spine. Weak glutes are a primary driver of lower back pain, and this pose targets them directly.
Beginner modification: Skip the hand clasp and keep arms flat by your sides for better stability. Reduce hold time to 15 seconds if needed.
Caution: Don’t let your knees fall outward — keep them tracking over your second toe throughout the hold.
Which yoga pose is best for lower back pain?
Child’s Pose (Balasana) is the single most effective starting pose for lower back pain because it passively decompresses the lumbar spine without requiring any muscle strength or flexibility. Hold it for 60 to 90 seconds. Most people feel measurable relief within the first 30 seconds. Pair it with Cat-Cow for the most immediate results.
Yoga Poses for Spine Health and Flexibility
The spine needs both strength and mobility — stiffness without strength leads to injury, and flexibility without support leads to instability. These yoga poses for spine health target both simultaneously, making them the backbone (literally) of any back pain recovery practice. Spine yoga exercises work best when performed in sequence, as each pose builds on the spinal range of motion established by the previous one.
Downward-Facing Dog (Adho Mukha Svanasana)
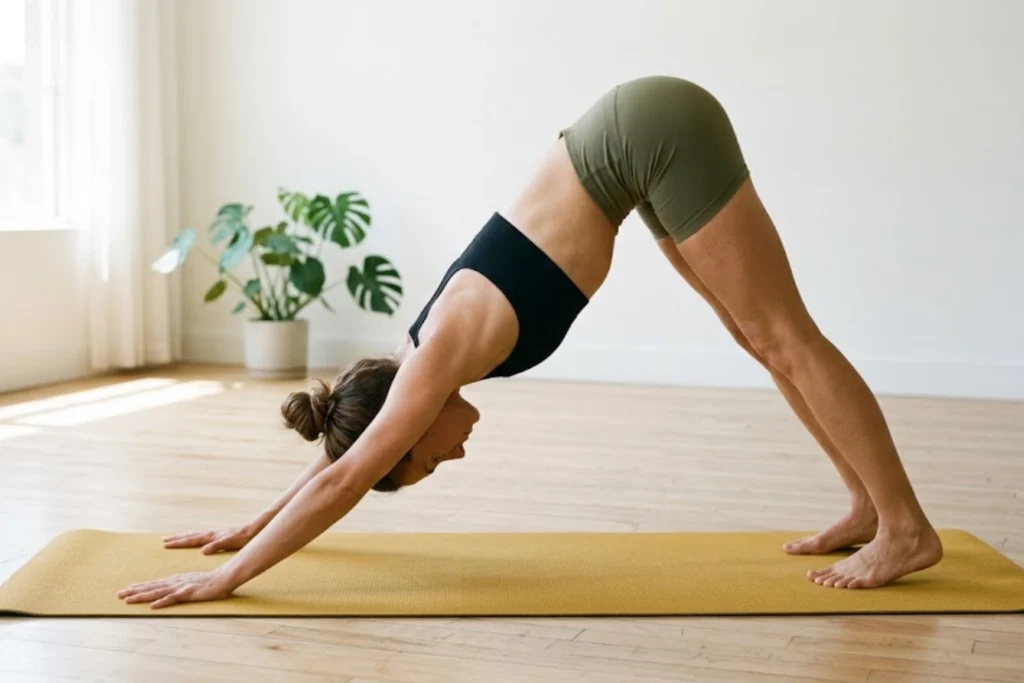
Best for: Full spinal decompression, hamstring tightness, postural upper back rounding
How to do it:
- Start on hands and knees, then tuck your toes and lift your hips toward the ceiling.
- Press your hands firmly into the mat — spread fingers wide.
- Straighten your legs as much as comfortable and let your heels drop toward the floor.
- Hold for 5 slow breaths, pedaling your feet gently to loosen hamstrings.
- Lower knees to the mat to come out.
Why it works: Downward Dog creates active traction along the entire spine — the weight of the torso gently lengthens each vertebral segment from sacrum to skull. It also stretches the hamstrings, which when tight, pull on the pelvis and increase lumbar curve.
Beginner modification: Bend your knees generously so the focus stays on spinal length rather than leg flexibility.
Caution: Avoid this pose if you have uncontrolled high blood pressure or a wrist injury.
Extended Triangle Pose (Trikonasana)
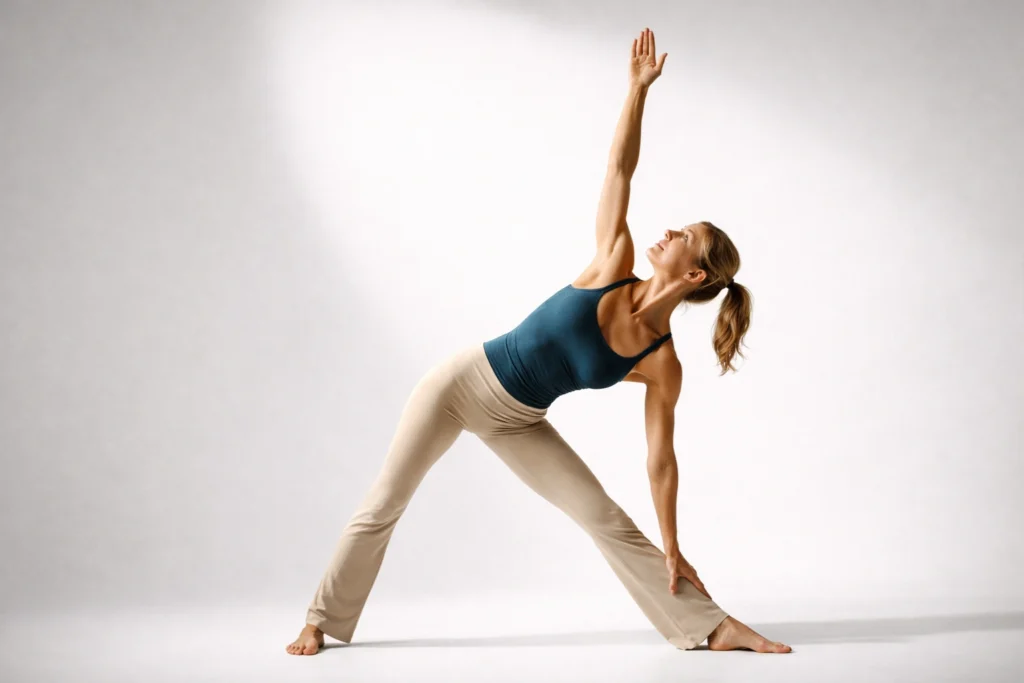
Best for: Lateral spinal compression, IT band tightness, one-sided back pain
How to do it:
- Stand with feet 3–4 feet apart. Turn right foot out 90 degrees, left foot in slightly.
- Extend arms out to the sides at shoulder height.
- Hinge at the right hip and extend your right hand toward your shin, ankle, or the floor.
- Extend your left arm toward the ceiling and gaze up at your left hand.
- Hold 30–45 seconds, then switch sides.
Why it works: Triangle Pose stretches the lateral spine, the intercostal muscles between the ribs, and the quadratus lumborum on the lengthened side — all common sites of tension in people who sit asymmetrically.
Beginner modification: Place your bottom hand on a yoga block instead of reaching for the floor.
Caution: Don’t collapse your torso forward — keep both sides of the waist equally long.
Cobra Pose (Bhujangasana)
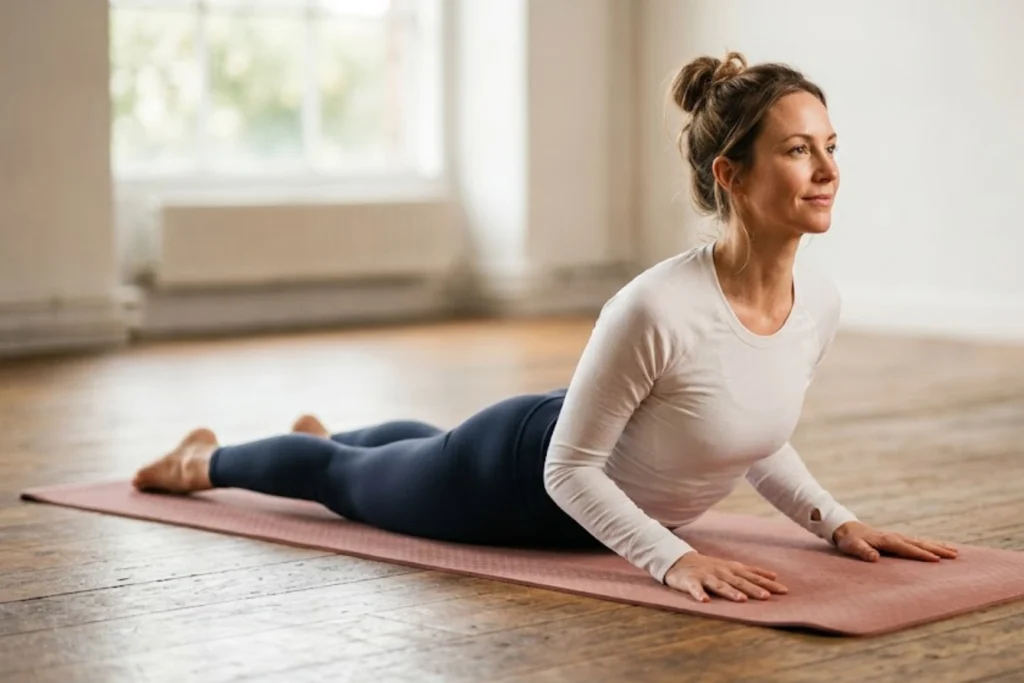
Best for: Disc-related lower back pain, lumbar flexion stiffness, thoracic extension
How to do it:
- Lie face down with hands under your shoulders, elbows close to your body.
- Press through your hands and lift your chest — only as high as is comfortable.
- Keep your elbows slightly bent and your pelvis on the mat.
- Hold for 20–30 seconds, breathing steadily.
- Lower slowly and rest your cheek on the mat.
Why it works: Cobra is a spinal extension exercise that’s particularly effective for disc-related pain — it encourages the nucleus pulposus (the disc’s center) to move away from the posterior nerve roots, reducing nerve irritation.
Beginner modification: Baby Cobra — lift your chest only a few inches, using your back muscles rather than your hands. This is safer and often more therapeutic for acute pain.
Caution: Avoid if you have spinal stenosis — extension poses can worsen stenosis symptoms.
Locust Pose (Salabhasana)
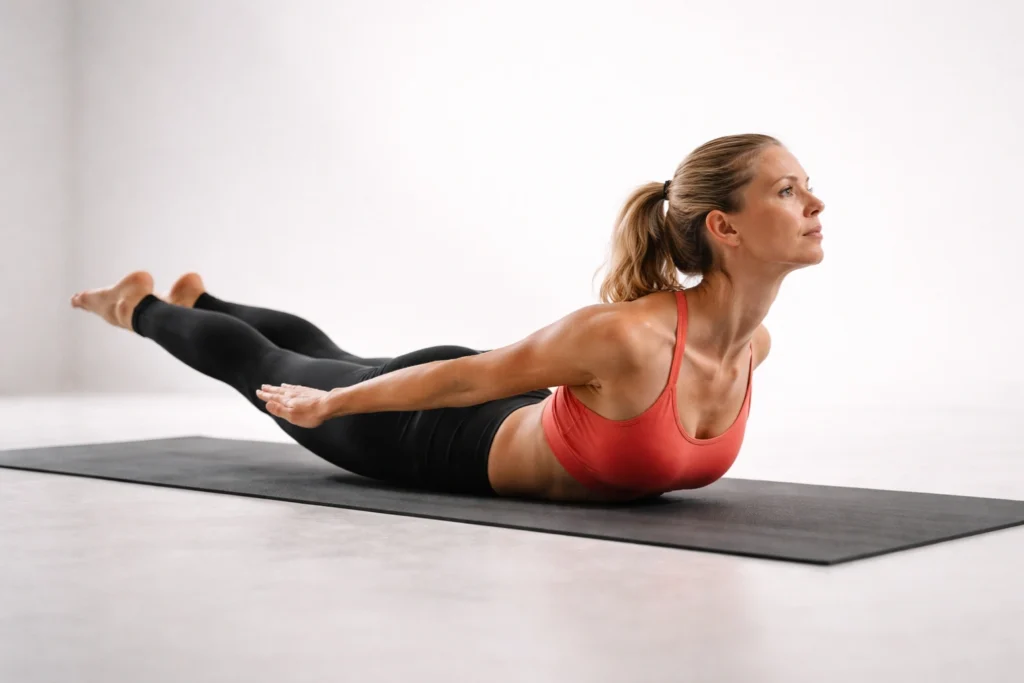
Best for: Paraspinal muscle weakness, postural back pain from prolonged sitting
How to do it:
- Lie face down with arms alongside your body, palms facing up.
- On an inhale, simultaneously lift your head, chest, arms, and legs off the mat.
- Squeeze your glutes and inner thighs together.
- Hold for 20–30 seconds, then lower slowly.
- Rest with your forehead on the mat between rounds.
Why it works: Locust Pose is one of the most effective yoga poses for spine strengthening because it targets the erector spinae and multifidus — the deep postural muscles that hold the spine upright — without any spinal loading or compression.
Beginner modification: Lift only the upper body first (keeping legs down) or only the legs (keeping chest down) until you build strength.
Caution: Avoid if you have a recent lumbar disc injury — the spinal extension and compression in this pose may aggravate an acute disc problem.
Seated Forward Bend (Paschimottanasana)
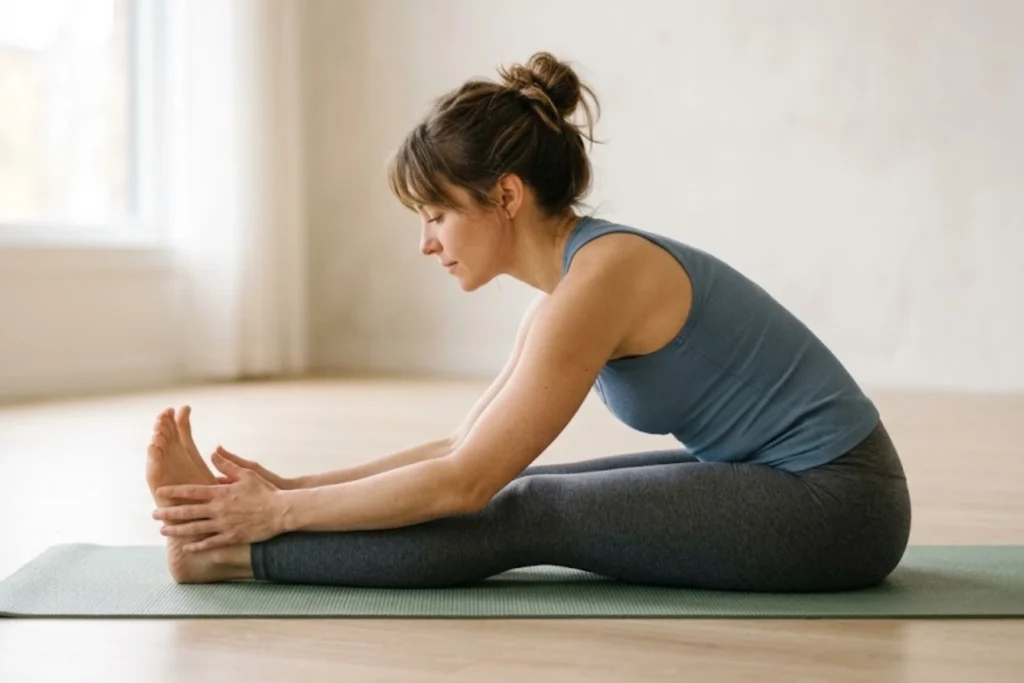
Best for: Hamstring tightness, lumbar tension, sciatic nerve lengthening
How to do it:
- Sit on the floor with legs extended straight in front of you.
- Flex your feet and sit tall — don’t let your lower back round yet.
- Hinge forward from your hips (not your waist), reaching toward your feet.
- Hold your shins, ankles, or feet — wherever you can reach without straining.
- Hold for 60 seconds, breathing into the back of your legs.
Why it works: This pose stretches the entire posterior chain — calves, hamstrings, glutes, and spinal erectors — in one continuous line. Tight hamstrings are directly linked to lower back pain because they limit pelvic mobility and increase lumbar strain.
Beginner modification: Loop a yoga strap or a towel around the soles of your feet so you can sit tall without rounding your back.
Caution: Don’t force the fold — a gentle stretch is enough. Rounding your spine aggressively here can strain the lumbar discs.
Are spine yoga exercises safe for beginners?
Spine yoga exercises are safe for beginners when practiced with proper form and within a pain-free range of motion. Start with supine and seated poses before moving to standing ones. Most beginners can practice safely within the first session. If any pose causes sharp, shooting, or worsening pain, stop immediately and consult a physical therapist or physician.
Yoga for Back and Neck Pain Relief
Upper back and neck pain often travel together — and for good reason. The thoracic spine, shoulders, and cervical vertebrae form a continuous kinetic chain. When your upper back rounds forward (as it does after hours at a desk), the neck compensates by jutting forward, compressing the cervical discs. Yoga for back and neck pain addresses both by opening the chest, strengthening the upper back, and restoring the natural cervical curve. If you experience yoga for sore back and neck regularly, this group is where you’ll feel the most immediate relief.
Thread-the-Needle Stretch
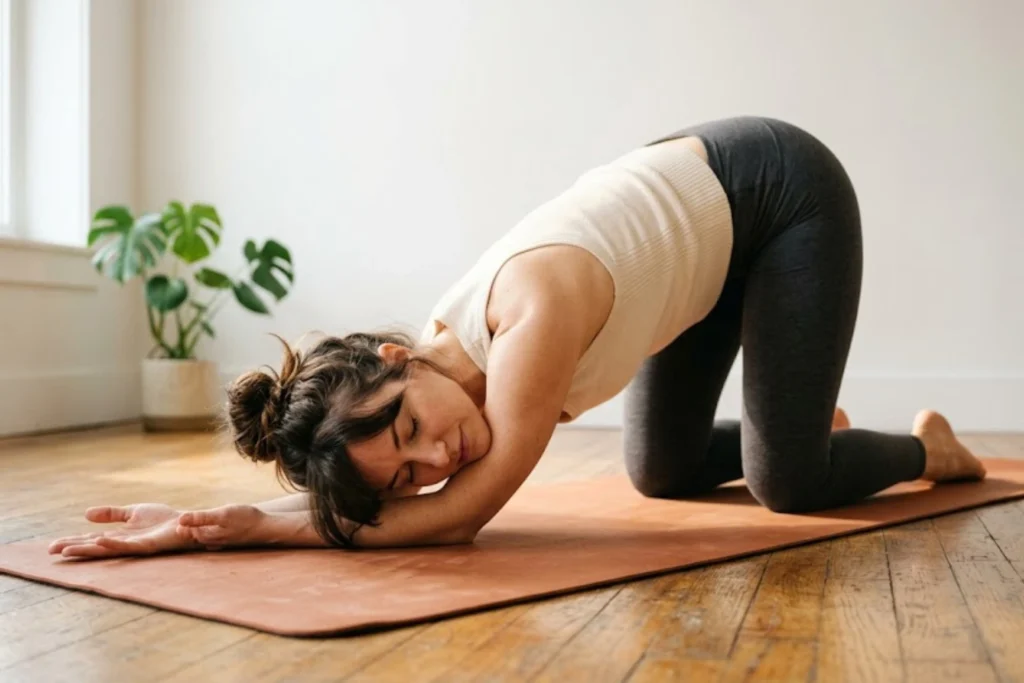
Best for: Upper back rotation stiffness, between-shoulder-blade tightness, neck tension
How to do it:
- Start on hands and knees.
- Slide your right arm underneath your left arm, palm facing up, and lower your right shoulder to the mat.
- Rest your right cheek on the mat and breathe.
- Hold 45–60 seconds, then use your left hand to press back up.
- Repeat on the other side.
Why it works: This pose creates a deep rotational stretch through the thoracic spine and posterior shoulder capsule — two of the most common tension sites in desk workers and anyone who drives frequently.
Beginner modification: Place a folded blanket under the lowered shoulder for support if the full range is uncomfortable.
Caution: Don’t force your head to the mat — let gravity bring it there gradually over the hold.
Eagle Arms (Garudasana Arms)
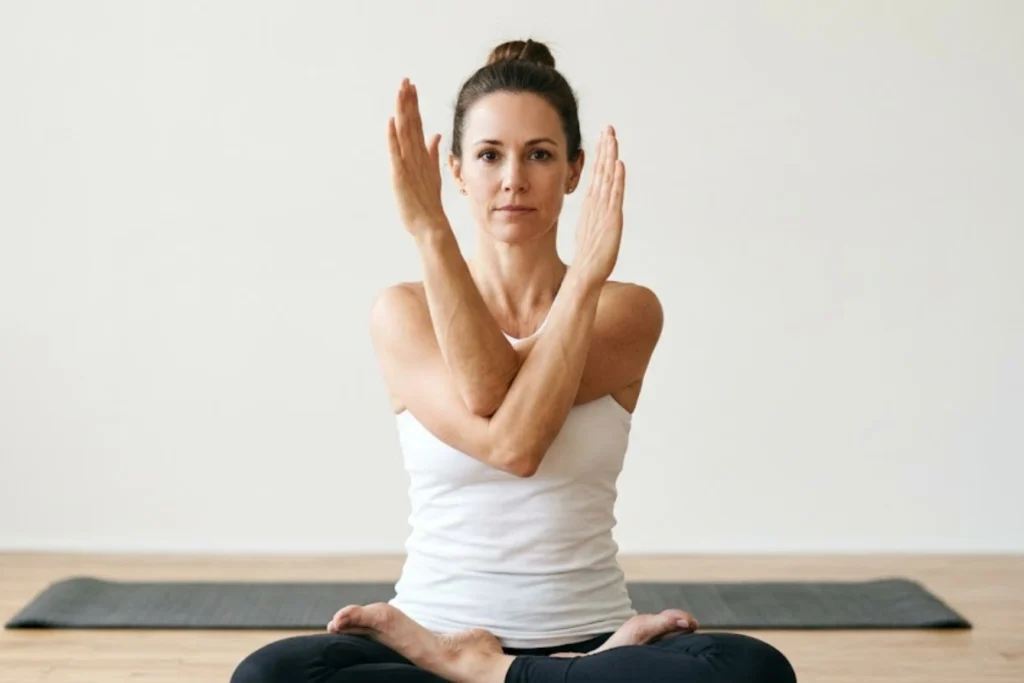
Best for: Between-shoulder-blade tension, neck stiffness, thoracic tightness
How to do it:
- Sit comfortably or stand tall.
- Extend arms forward and cross the right arm under the left at the elbow.
- Bend elbows and try to bring palms together (or backs of hands together).
- Lift elbows to shoulder height and draw them slightly forward.
- Hold 30 seconds, then switch — left arm under right.
Why it works: Eagle Arms creates traction between the shoulder blades, stretching the rhomboids and trapezius — the muscles most responsible for the “knot” feeling between the shoulders that radiates into the neck.
Beginner modification: Simply hug your arms across your chest if the full arm wrap isn’t accessible — you’ll still get the rhomboid stretch.
Caution: If you have a recent shoulder injury or rotator cuff problem, skip the arm wrap and use the modification instead.
Neck Rolls with Chest Opener
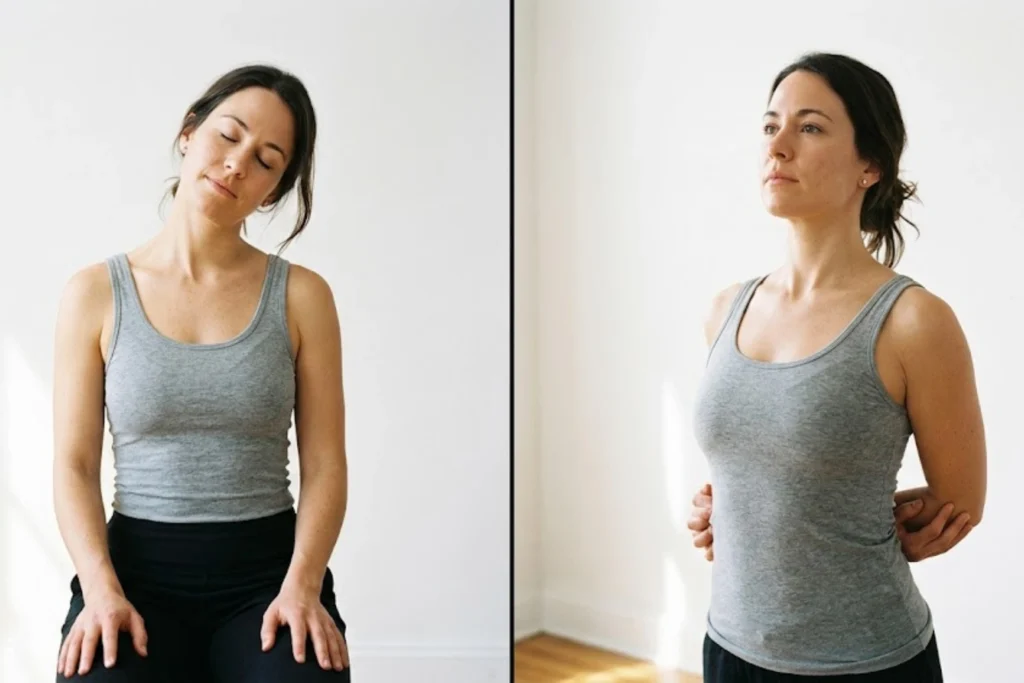
Best for: Cervical stiffness, forward head posture, neck and upper back combined tension
How to do it:
- Sit tall with hands resting on your thighs.
- Slowly drop your right ear toward your right shoulder. Hold 20 seconds.
- Roll your chin slowly toward your chest, then to the left shoulder. Hold 20 seconds each side.
- Interlace your fingers behind your back, straighten your arms, and lift your chest.
- Hold the chest opener for 30 seconds, breathing deeply.
Why it works: The lateral neck stretch decompresses the cervical facet joints and lengthens the sternocleidomastoid. The chest opener counteracts the forward rounding of the thoracic spine, taking pressure off the cervical vertebrae from below.
Beginner modification: Do the neck stretches seated in a chair rather than on the floor — the effect is identical.
Caution: Never roll your head in a full circle — skip the backward extension, which compresses the cervical spine. Front, sides, and down only.
Supported Fish Pose (Matsyasana)
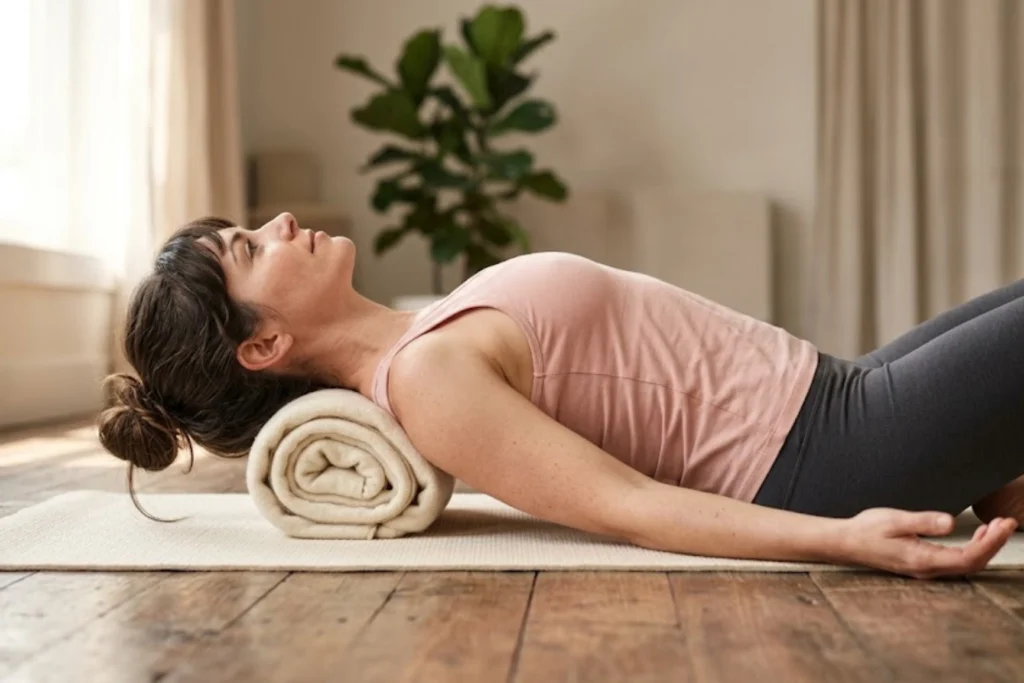
Best for: Thoracic kyphosis (rounded upper back), chest tightness, neck forward posture
How to do it:
- Sit on the floor and place a rolled blanket or yoga block horizontally behind you at mid-back level.
- Lower yourself back over the support so it presses into your thoracic spine.
- Let your head drop back (use a second blanket under your head if needed).
- Rest your arms out to the sides, palms up.
- Hold 2–3 minutes, breathing deeply into the chest.
Why it works: Supported Fish is a passive thoracic extension exercise — the prop does all the work, gently opening the chest and reversing the forward rounding that compresses the discs in the upper back and strains the neck.
Beginner modification: Use a thinner roll (a tightly folded blanket rather than a firm block) so the extension is very gentle.
Caution: Avoid if you have a cervical disc injury — the neck extension in this pose may aggravate symptoms.
Puppy Pose (Uttana Shishosana)
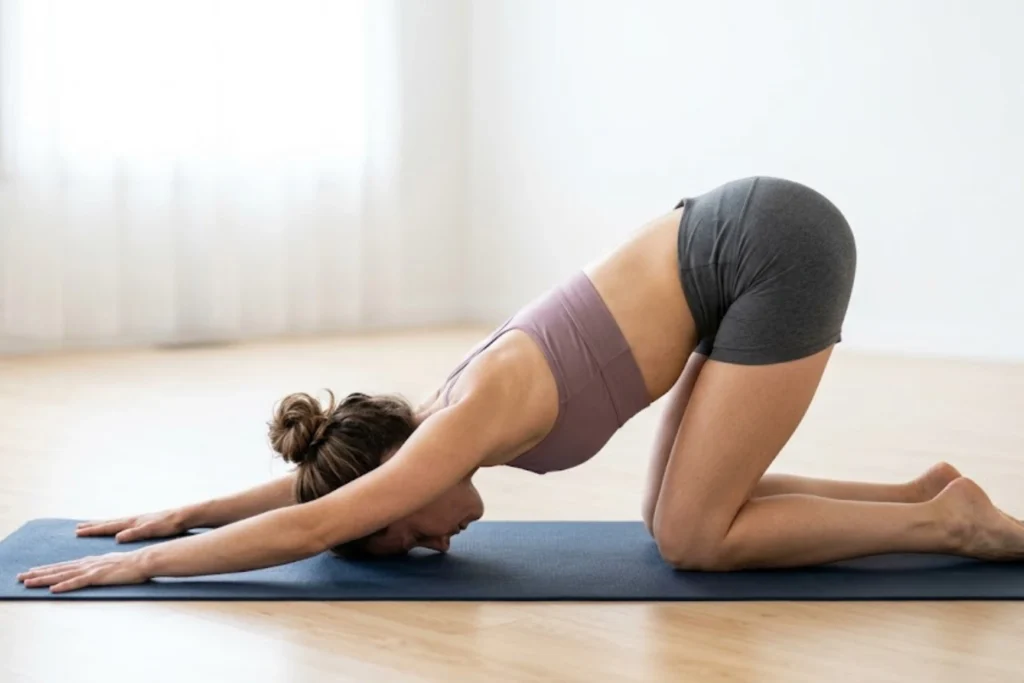
Best for: Thoracic spine flexibility, shoulder tightness, combined upper and lower back stiffness
How to do it:
- Start on hands and knees.
- Walk your hands forward while keeping your hips over your knees.
- Lower your chest and forehead toward the mat, stretching your arms overhead.
- Let your armpits melt toward the floor.
- Hold 60–90 seconds, then walk hands back to return.
Why it works: Puppy Pose stretches the latissimus dorsi — one of the largest muscles in the body, connecting the lower back to the upper arm — as well as the thoracic extensors. Tightness here is a common but overlooked contributor to both upper and lower back pain.
Beginner modification: Place a folded blanket under your forehead if it doesn’t reach the mat comfortably.
Caution: Keep your hips directly over your knees throughout — if they drift back, you lose the upper back stretch and increase lumbar compression.
Can yoga help with both back and neck pain at the same time?
Yoga can address back and neck pain simultaneously because they share the same root cause: thoracic tightness and forward postural collapse. Poses like Thread-the-Needle, Eagle Arms, and Supported Fish target the full upper-body kinetic chain in a single session. Practicing these 3 poses daily for 2 to 4 weeks produces measurable improvement in both cervical and thoracic mobility.
Also Read: How to Meditate for Beginners
Yoga Poses for Chronic and Persistent Back Pain
Chronic back pain — defined as pain lasting more than 12 weeks — requires a different approach than acute pain. The nervous system becomes sensitized over time, and the relationship between pain and tissue damage becomes complicated. The best yoga for back pain in chronic cases is gentle, restorative, and consistent. These poses prioritize nervous system calming, deep tissue release, and sustained hold times that allow genuinely guarded muscles to let go. Research specifically asking which asana is good for chronic low back pain consistently points to gentle hip openers and restorative inversions over aggressive strengthening.
Legs-Up-the-Wall (Viparita Karani)
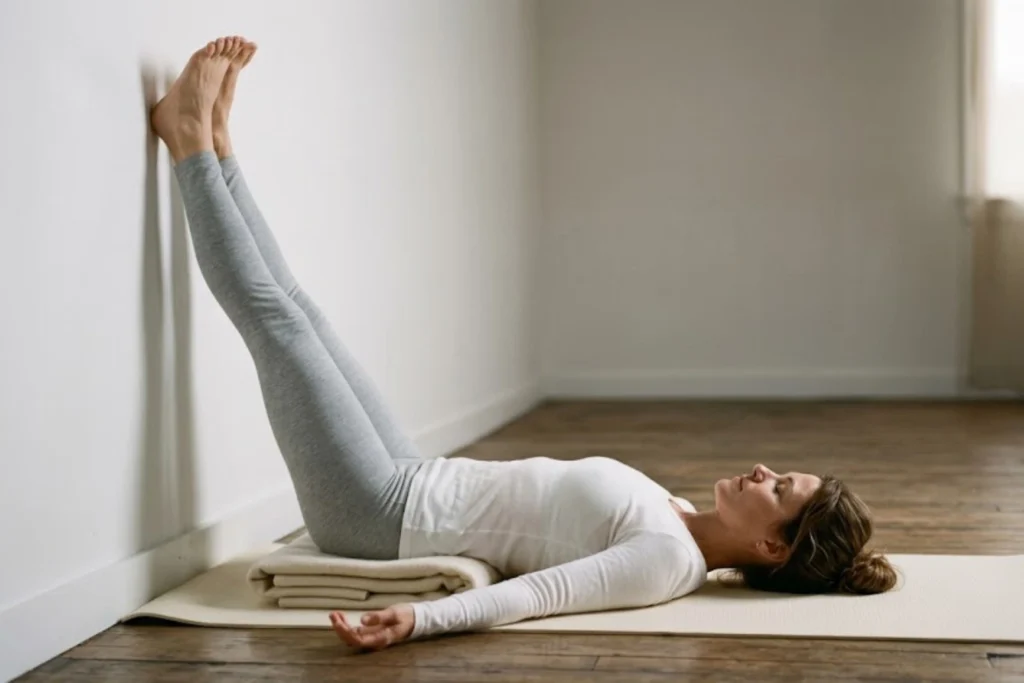
Best for: Chronic lumbar ache, end-of-day back fatigue, nervous system sensitization
How to do it:
- Sit sideways against a wall, then swing your legs up as you lie back.
- Let your legs rest vertically against the wall, arms relaxed by your sides.
- Place a folded blanket under your hips for support if needed.
- Close your eyes and hold 3–5 minutes, breathing naturally.
- Bend your knees, roll to one side, and press up slowly.
Why it works: This passive inversion reverses the gravitational load on the lumbar spine and reduces venous pooling in the legs — a common contributor to late-day back ache. It also activates the parasympathetic nervous system, which down-regulates chronic pain sensitivity.
Beginner modification: Place a folded blanket under your hips to lift your pelvis slightly — this makes the pose more comfortable if your hamstrings are tight.
Caution: Avoid if you have glaucoma, or if the inversion causes dizziness. Roll to one side slowly when coming out.
Pigeon Pose — Gentle Version (Kapotasana)

Best for: Piriformis tightness, hip-related low back pain, sciatic nerve tension
How to do it:
- From hands and knees, bring your right knee forward and place it behind your right wrist.
- Extend your left leg straight behind you, keeping the hip square.
- Lower your torso forward over your right shin — rest on your forearms or all the way down.
- Hold 90 seconds to 2 minutes, breathing slowly.
- Press up, tuck your back toes, and switch sides.
Why it works: Pigeon Pose provides a deep external rotation stretch to the piriformis muscle — which, when tight, can compress the sciatic nerve and create hip-to-lower-back pain that’s often misdiagnosed as lumbar disc problems.
Beginner modification: Do Supine Pigeon instead — lie on your back, cross your right ankle over your left thigh, and flex your right foot. This gives the same stretch with far less hip joint stress.
Caution: If you feel sharp knee pain in this pose, come out immediately — this is a hip stretch, not a knee stretch. Use the supine version.
Half Lord of the Fishes (Ardha Matsyendrasana)
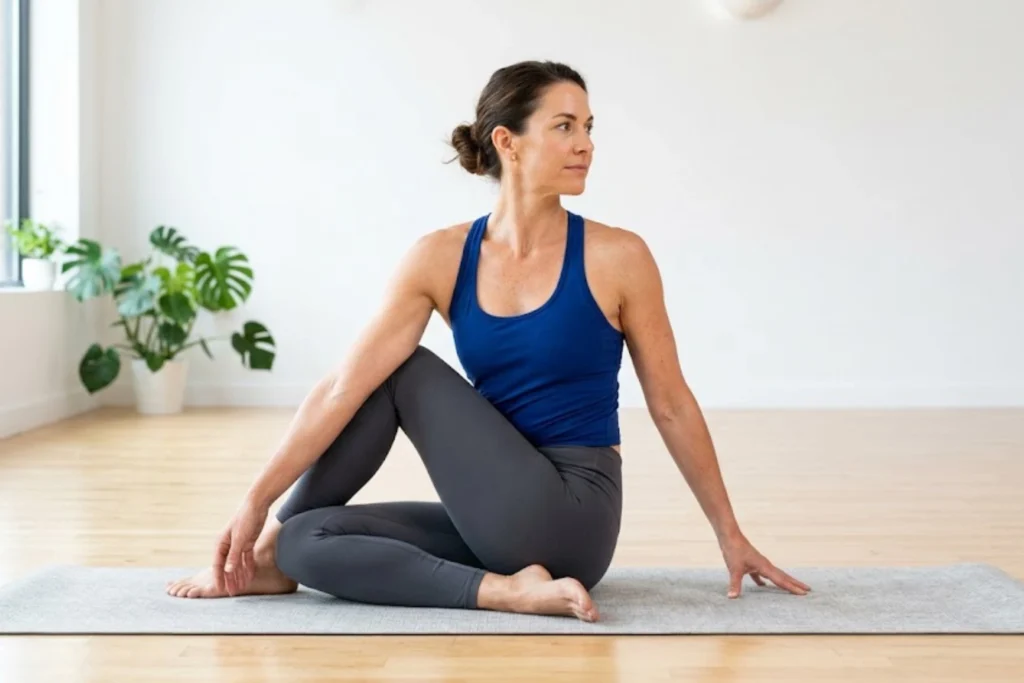
Best for: Thoracic and lumbar rotation stiffness, chronic one-sided back pain
How to do it:
- Sit on the floor with legs extended. Bend your right knee and place your right foot outside your left thigh.
- Sit tall and twist to the right, placing your left elbow outside your right knee.
- Place your right hand behind you for support.
- Hold 45–60 seconds, lengthening your spine on each inhale, deepening the twist gently on each exhale.
- Return to center and repeat on the other side.
Why it works: This seated twist mobilizes the thoracic and lumbar spinal segments in rotation — a movement pattern frequently lost in people with chronic pain who subconsciously guard the area. Restoring rotational mobility reduces the mechanical load on the spine.
Beginner modification: Keep the bottom leg extended rather than crossed if hip tightness prevents sitting tall.
Caution: Do not force the twist. The rotation should feel like a gentle wringing, not a crank.
Wide-Angle Seated Forward Bend (Upavistha Konasana)
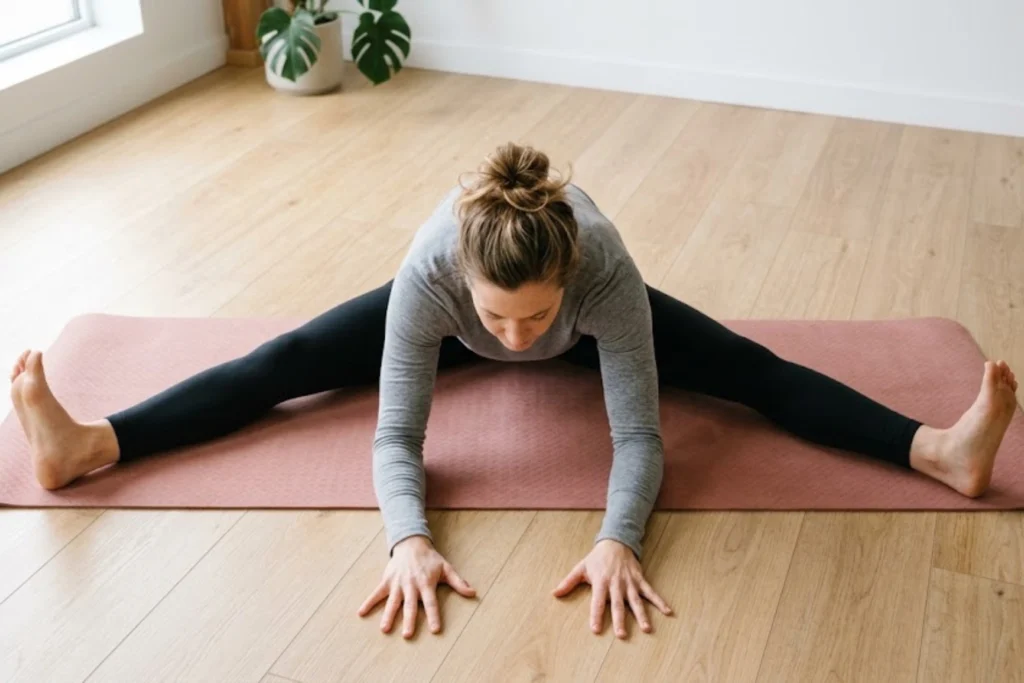
Best for: Inner thigh and groin tightness affecting pelvic tilt, chronic low back tension
How to do it:
- Sit on the floor and open your legs as wide as is comfortable — no need to go to extremes.
- Flex your feet and press the backs of your thighs into the mat.
- Hinge forward from your hips — keep your spine as long as possible.
- Walk your hands forward and hold wherever you land for 60–90 seconds.
- Walk hands back and gently bring legs together.
Why it works: Tight adductors (inner thigh muscles) pull on the pelvis and contribute to lumbar imbalance. This pose stretches them along with the hamstrings and lower spinal erectors in a sustained hold that’s deeply effective for chronic tension.
Beginner modification: Sit on the edge of a folded blanket to tilt your pelvis forward if your lower back rounds significantly when sitting upright.
Caution: Don’t widen your legs past the point of discomfort chasing a “better” stretch — the hold time creates the effect, not the range.
Corpse Pose with Body Scan (Savasana)
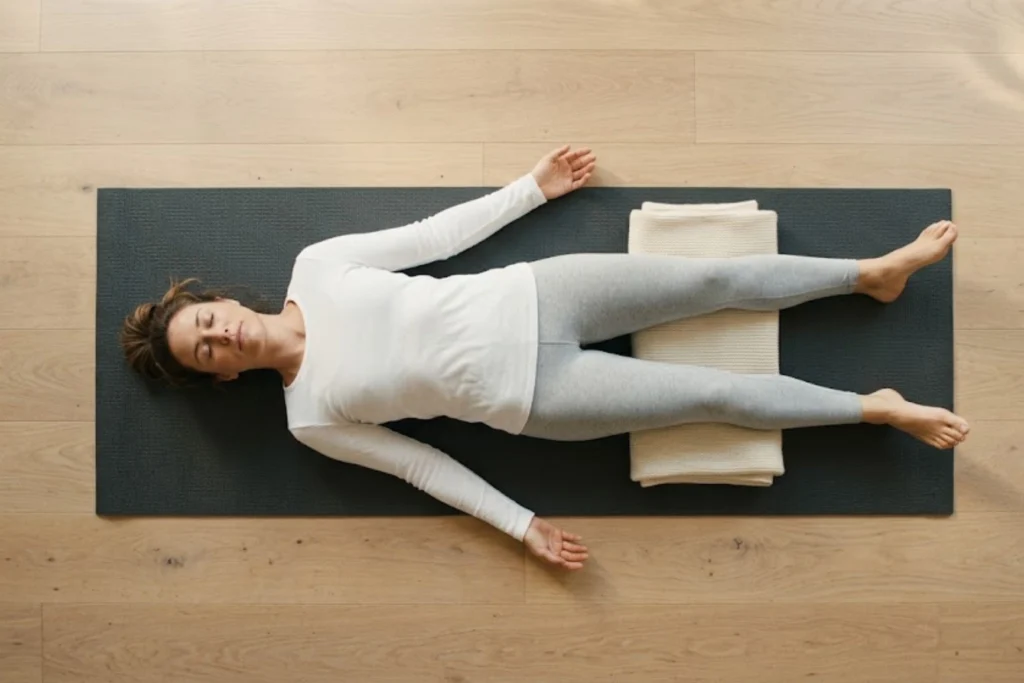
Best for: Chronic pain nervous system regulation, full-body tension release, practice integration
How to do it:
- Lie flat on your back with arms slightly away from your body, palms up.
- Let your feet fall open naturally. Close your eyes.
- Starting from your feet, mentally scan each body part for tension — without trying to fix it, just notice.
- Breathe naturally for 3–5 minutes, letting your body sink heavier into the floor with each exhale.
- Roll to one side before pressing up — never sit straight up from this pose.
Why it works: Savasana isn’t just a rest — it’s where the nervous system integrates the practice. For people with chronic back pain, whose nervous systems are often in a sustained low-grade alert state, this intentional stillness trains the body to access a relaxed baseline. Over time, this lowers chronic pain sensitivity.
Beginner modification: Place a rolled blanket under your knees if lying flat puts pressure on your lower back.
Caution: If lying flat on a hard floor is painful, practice this on a firm mattress or with a thick yoga mat.
What the Research Says About Yoga Poses to Relieve Back Pain
The evidence for yoga is stronger than most people expect — and more specific than the general “exercise is good for you” advice.
The most significant study: a 2017 randomized controlled trial published in the Annals of Internal Medicine enrolled 320 adults with chronic low back pain and randomly assigned them to yoga, physical therapy, or an education-only group. After 12 weeks, both the yoga and physical therapy groups showed equivalent reductions in pain and functional disability. What this means for you: a yoga practice built around yoga poses to relieve back pain isn’t a soft alternative to medical treatment — it produces the same clinical outcomes as the standard medical referral for chronic back pain.
The second landmark finding comes from a 2013 Cochrane Review — the most rigorous type of systematic evidence review — which analyzed multiple studies on yoga for chronic non-specific lower back pain. The reviewers found moderate-quality evidence that yoga produces short-term improvements in back function and pain intensity compared to no exercise.
What that means practically: even if you start with just three sessions per week and the six beginner poses in this guide, you’re likely to see measurable improvement within four to six weeks.
The bottom line? Regular yoga practice — even short, beginner-level sessions — produces real reductions in back pain and improved spinal function, supported by clinical trial evidence.
Beginner Yoga for Lower Back Pain: Your First 15-Minute Session
This beginner yoga for lower back pain routine uses six poses from this guide. No equipment required beyond a yoga mat and enough floor space to lie down. Aim for 3–4 sessions per week for the first four weeks — then reassess how your pain has changed.
Your 15-Minute Beginner Routine:
- Cat-Cow Stretch — 2 minutes (8–10 slow rounds, one breath per movement)
- Child’s Pose — 2 minutes (hold, focus on breathing into your lower back)
- Knees-to-Chest Pose — 2 minutes (30 sec gentle rocking, 90 sec hold)
- Bridge Pose — 2 minutes (3 rounds of 30-second holds with 15-second rest between)
- Supine Spinal Twist — 2 minutes (60 seconds each side)
- Corpse Pose with Body Scan — 3 minutes (full stillness, eyes closed)
Total: 13–15 minutes.
The first session will feel unfamiliar. The second session will feel better. By the fourth session, you’ll notice a difference in how your back feels when you get out of bed. Give it four weeks before you judge the results.
Frequently Asked Questions About Yoga for Back Pain
Which asana is good for chronic low back pain?
Legs-Up-the-Wall (Viparita Karani) is one of the most effective asanas for chronic low back pain because it passively decompresses the lumbar spine and calms the nervous system simultaneously. Research on which asana is good for chronic low back pain consistently highlights restorative poses with sustained hold times. Practice it for 3 to 5 minutes daily for the best results.
How long does yoga take to relieve back pain?
Yoga poses to relieve back pain typically produce noticeable improvement within 4 to 6 weeks of consistent practice. The 2017 Annals of Internal Medicine trial showed significant pain reduction after just 12 weeks of weekly yoga. Most practitioners report meaningful relief — better mobility, reduced morning stiffness — within the first 2 to 3 weeks of regular sessions.
Can beginners with severe back pain do yoga safely?
Beginners with severe back pain can practice yoga safely by starting with supine and seated poses only, never pushing into pain. Beginner yoga for lower back pain should begin with just 3 poses held gently — Child’s Pose, Knees-to-Chest, and Corpse Pose — and expand slowly. Always consult a physician before starting if your pain is acute, severe, or accompanied by leg numbness.
Is yoga better than exercise for back pain?
The best yoga for back pain produces outcomes equivalent to physical therapy, according to the 2017 Annals of Internal Medicine randomized controlled trial — the most rigorous comparison to date. Yoga isn’t necessarily better than all exercise, but it’s as effective as the gold-standard medical referral for chronic back pain, with the added benefit of being free, accessible, and self-directed.
Can yoga fix both back and neck pain together?
Yoga for back and neck pain works simultaneously because both problems often share the same root cause: thoracic tightness, forward head posture, and weak upper back muscles. Poses like Thread-the-Needle, Eagle Arms, and Supported Fish address the entire posterior chain in one session. Practicing these 3 poses 4 times per week typically improves both areas within 3 to 4 weeks.
You’ve Already Done the Hardest Part
Three things are worth carrying with you from everything above. First, yoga poses for back pain through real physiological mechanisms — muscle strengthening, spinal decompression, and nervous system regulation — not placebo. Second, consistency across weeks matters far more than perfect form in any single session. Third, you don’t need to commit to an hour-long practice — fifteen minutes, four days a week, is clinically meaningful.
Your back pain is real. The stiffness, the ache, the way it limits ordinary moments — none of that is in your head. And the effort you’re making to understand and address it genuinely matters.
Start with Child’s Pose tonight. Just 60 seconds. That’s all it takes to begin.

